Step 41. Install Additional Cards and Devices
When the system is operating properly, turn it off, unplug the line power cord, and install the next internal add-on card. When the card is installed properly and secured with a mounting screw, plug the system back into the wall socket and turn it back on.
After installing any necessary drivers ( card manual or card manufacturer's website for details), you should have complete functionality. Check and verify this before you proceed.
Repeat this procedure until all of your add-in cards or devices are installed and working properly. If you are upgrading from an old system, you may find that you have more ISA cards than you have ISA slots in your new AMD Athlon processor-based system. This is because ISA cards are nearing the end of their technologically useful life. The next section illustrates some superior PCI replacements for many older ISA cards, so that you can continue to have the same (or superior) functionality in you new AMD Athlon processor-powered system.
top
ISA and PCI Card Options
When you upgrade from an older system, you may find that all your old ISA cards won't fit in your new AMD Athlon processor-based system.
Photo 52 shows network cards (top), sound cards (middle), and SCSI cards (bottom). The ISA is on the left and the superior PCI card is on the right. In every case, the PCI card has added functionality. Where the ISA network card is 10BaseT, the PCI card is 10/100BaseT, for ten times the maximum throughput.
The PCI soundcard typically adds 3D wavetable sound positioning and the latest
PCI SCSI cards are UltraSCSI for fast throughput.

Photo 52. ISA and PCI Card Options
top
Two Modems
Modems are typically not available in PCI format. This is because modems use a low-speed 8-bit communication protocol and cannot gain from the additional speed that is possible in a 32-bit PCI slot.
Photo 53 shows two typical modem designs. The modem on the top uses the full
16-bit ISA slot. The modem on the bottom uses only the 8-bit portion of the
ISA slot. Either of these modems will work in your new AMD Athlon processor-powered
systems.
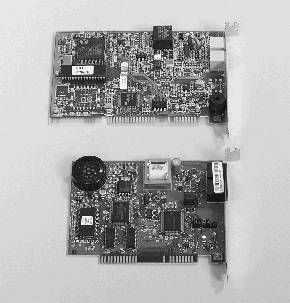
Photo 53. Two Modems
top
AGP and PCI Video
Both of the cards shown in Photo 54 will also work in your AMD Athlon processor-powered system. However, the performance and technology in the new AGP (advanced graphics port) graphics card better complements the performance of the AMD Athlon processor.
Because the AGP port is 64-bits wide and runs at 66 MHz (2X AGP), you have the potential for four times the bandwidth--four times the performance--compared to a 32-bit 33 MHz PCI board. You will also notice that there is a fan on the AGP card. That is because the graphics processor on the AGP card runs at a much faster speed (and therefore develops more heat) than the graphics processor on the PCI graphics card.
Bottom line--only install an AGP graphics card in your new AMD Athlon processor-powered
system to get the enhanced performance benefits from the technology designed
into your new processor and motherboard.
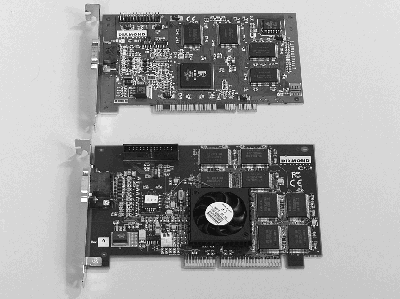
Photo 54. AGP and PCI Video
top
Step 42. Secure the Cards
When you finish installing all of your cards and devices, install and tighten down the screws in the blocking plates. In Photo 55, the screw in the last blocking plate is being tightened.
Notice that there is an open slot next to the AGP card. Modern AGP cards have as much memory and processing power as desktop computers of a few years ago. They need room for proper airflow to keep components running cool and reliably.
There is also an empty slot next to the sound card, because the sound card
is also a very significant source of heat.
Before this system is run, the sound cable should be tiewrapped
to the top of the exhaust cooling fan to remove it from the airflow
path
.
Photo 55. Cards Installed
top
Step 43. Periodically Check on Driver
Updates
Your system should now be fully configured and running properly. You should periodically check both the AMD website at www1.amd.com/athlon/config and the websites of the manufacturers of your critical components to see if any updated drivers have been released.
top
Notes
Keep notes on trouble issues and problems you come across, as well as the results and fixes. It is easy to keep track of the technicians' names and telephone numbers as well as the resolutions to the problem in a little notebook.
top
Final Walk-Through
Give your system one last inspection before you put the case covers back on
and start installing all your applications and data.
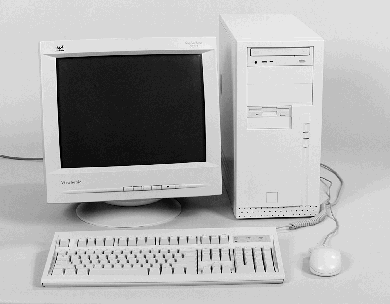
Photo 56. A Completed System
top
|


